Last updated October 9, 2026






Free written scope consultation - allowances, timeline, and change-order rules on paper before a single trade is scheduled
Kitchen Remodeling Maintenance Schedule: What to Do and When
Here’s a fact most kitchen remodelers won’t tell you at closeout: the silicone caulk joint where your countertop meets the backsplash has a functional lifespan of two to three years before it cracks or molds. Most homeowners in Los Angeles wait until there’s visible water damage behind the wall to address it, and by then the repair costs three times what a five-dollar tube of caulk would have. This guide gives you a straight maintenance schedule for a remodeled kitchen: what to inspect, when to inspect it, and which tasks you can handle versus which ones need Kitchen Remodeling services from a licensed contractor. We’ll cover the 30-day post-installation checklist, annual maintenance by countertop material, range hood filter intervals, caulk inspection routines, and the under-sink plumbing checks that catch a leak before it rots out your cabinet base.
Styles & brands we work with






Quick Answer
A remodeled kitchen needs a 30-day post-installation inspection (hinges, drawer slides, faucet connections, grout cure), annual maintenance by material type (sealing granite and marble, oiling butcher block, checking quartz seams), range hood filter replacement every one to six months depending on filter type, seasonal caulk inspection at the sink and backsplash joint, and under-sink plumbing checks every ninety days. Treat the kitchen as a system with service intervals, not a finished product. Skip these intervals and you’ll pay for it in water damage, failed seals, and cabinet hardware that grinds itself to death.
Table of Contents
- The 30-Day Post-Installation Checklist
- Annual Maintenance by Countertop Material
- Under-Sink Plumbing: What to Check and When
- Range Hood Filter Replacement by Filter Type
- The Seasonal Caulk Inspection Routine
- Cabinet Hardware and Drawer Slide Maintenance
- Common Mistakes to Avoid
- When to Call a Professional
- Frequently Asked Questions
- The Bottom Line
The 30-Day Post-Installation Checklist
The first month after a kitchen remodel is when install defects show up. Wood settles into the humidity of your home, hinges bed in, and any connection that was finger-tight at install starts to work loose. This is the window to catch problems while the contractor’s warranty is active and before a small issue becomes a callback nobody wants. Here’s the checklist we give every client at closeout on a Kitchen Remodeling in Los Angeles project.
- Cabinet hinge adjustments. Open every door to 90 degrees and let go. A properly adjusted hinge holds position. If a door drifts shut or swings open, tighten the adjustment screw on the hinge plate. New cabinets settle; this is normal. Two or three doors needing adjustment in the first month is expected. Ten doors needing adjustment means the installer rushed the hang.
- Drawer slide seating. Pull each drawer to full extension and push it closed. Listen for grinding, clicking, or a catch at the last inch. A drawer that doesn’t seat flush against the cabinet face needs the slide adjusted. This is a five-minute fix with a screwdriver in month one and a frustration every day after if ignored.
- Faucet connection checks. Run the faucet hot and cold for sixty seconds each. Then wipe down the supply lines under the sink with a dry paper towel. Any moisture means the compression fitting was not torqued at install. Catch this now, not after the cabinet floor swells.
- Grout cure verification. Tile grout reaches full hardness at 28 days. Before that, it’s soft enough to dent with a fingernail. At the 30-day mark, press a thumbnail into the grout in an inconspicuous corner. It should feel like stone. If it crumbles or powders, the grout was mixed too wet or cured in humidity, and the installer needs to know before the warranty clock runs out.
- Dishwasher drain loop inspection. Pull the dishwasher out from under the counter a few inches and check that the drain hose runs up to the underside of the counter before dropping down to the sink drain. If it doesn’t, dirty sink water can backflow into your dishwasher. This loop is required by code in Los Angeles and missing on roughly a third of remodels we inspect.
Document everything you find in writing, photograph it, and email it to your contractor. A disciplined contractor wants this list. It makes their warranty period cleaner and their callback rate lower. The ones who don’t want the list are telling you something.
Annual Maintenance by Countertop Material
Countertops are not maintenance-free. The stone yard sells them as slabs and the fabricator sells them as durable, but every surface in your kitchen has a service interval. Here’s what each material needs annually, specific to the Los Angeles climate where hard water from city supply lines leaves mineral deposits that accelerate wear on sealers and finishes.
Quartz (Cambria, Caesarstone, Silestone). Quartz is engineered stone: roughly 93% crushed quartz held together with resin binders. It does not need sealing, ever. What it needs is protection from heat, because the resin binder scorches at temperatures above 300 degrees. Annual maintenance is a deep clean with a pH-neutral stone cleaner and a check for dull spots where the resin has been scratched by abrasive cleaners. Do not use bleach, vinegar, or oven cleaner on quartz. The resin dulls permanently, and no amount of polishing restores it. If your quartz seam is separating at the joint where two slabs meet, that’s an install failure, not a maintenance issue, and it’s covered under a proper workmanship warranty.
Granite. Granite is porous. It absorbs oil, wine, and water if the sealer wears off. The standard test: pour a quarter-cup of water on the surface and let it sit for ten minutes. If the water beads, the seal is intact. If it soaks in and darkens the stone, the sealer is gone. Reseal annually with a penetrating stone sealer, which is a wipe-on, dry, wipe-off job that takes twenty minutes. In Los Angeles, where cooking leans toward olive oil and citrus, granite near the range needs resealing every six to twelve months depending on use.
Marble. Marble is calcium carbonate, which means acid etches it. Lemon juice, tomato sauce, red wine, even vinegar-based cleaners leave dull white marks that are not stains and will not scrub out. Annual care includes resealing every six to twelve months with a marble-specific penetrating sealer, wiping spills immediately, and accepting that a honed finish hides etches better than a polished one. If you’re considering marble for a Los Angeles kitchen, understand that it will develop a patina. That’s the material. If you want a surface that looks new forever, buy quartz.
Butcher block. Wood countertops need oil. Food-grade mineral oil or a beeswax-and-oil blend, applied monthly for the first year and quarterly after that. The annual task is a deep clean with fine steel wool to lift embedded food particles, followed by a generous oil application left overnight and buffed off. In Los Angeles’s dry inland heat, butcher block dries and shrinks faster than in coastal humidity zones. Cracks at the end grain are a sign the board went too dry too long.
Tile countertops. The tile itself is nearly indestructible. The grout is not. Annual maintenance is a grout inspection with a flashlight: look for hairline cracks, crumbling along the edge of tiles, and discoloration that indicates moisture penetration. Recaulk the tile-to-backsplash joint at the same time. Clean grout with a pH-neutral cleaner, not acid. Muriatic acid dissolves cement-based grout and turns a small cleaning job into a regrout.
Under-Sink Plumbing: What to Check and When
Under-sink plumbing is the most common source of kitchen water damage, and the slow leaks that cause it never announce themselves. They drip for months, soak the cabinet floor, swell the particleboard, and grow mold before anyone notices. Here’s the inspection routine that catches it early.
Every 90 days, do this:
- Clear out the cabinet. Pull everything out. You’re looking at the floor of the cabinet, not the stuff in it. Sponges and cleaning bottles hide leaks.
- Run water and feel each connection. Run the faucet hot for thirty seconds, then cold for thirty seconds. Run the garbage disposal with water running. While each is running, wipe the supply line connections, P-trap joints, and disposal mount with a dry paper towel. Moisture on the towel means a fitting is working loose.
- Check the cabinet floor for swelling. Press your thumb into the cabinet floor along the back edge, right under the supply lines. If the material gives or feels spongy, water has been sitting. Particleboard swells permanently. Plywood cabinet floors resist one or two leaks but will delaminate with repeated exposure.
- Inspect the disposal mount. Grab the disposal at the bottom and twist. It should not rotate at the sink flange. A loose disposal mount allows water to drip at the flange and drain into the cabinet. The fix is tightening the snap ring from underneath, which takes two minutes if you catch it before the plumber’s putty washes out completely.
- Check the dishwasher drain connection. The dishwasher drain hose connects to the sink drain or disposal. That hose clamp loosens with vibration. If you see mineral crust or soap residue at the connection, it’s been leaking intermittently. Tighten the clamp or replace it, and monitor for a week.
Early failure looks like this: a white or green crust at a brass fitting (mineral deposits from slow evaporation), a dark stain on the cabinet floor with no standing water (previous wetting), or a musty smell when you open the cabinet after it’s been closed overnight (active mold growth under the floor). None of these are emergencies today, but they are Kitchen Remodeling Warning Signs Every Homeowner Should Know. All of them are expensive in twelve months if you do nothing.
Range Hood Filter Replacement by Filter Type
Range hood filters are the most neglected maintenance item in a remodeled kitchen because they’re out of sight above eye level. They’re also the one item that affects both air quality and fire risk. A grease-saturated mesh filter is kindling, and a clogged one turns your range hood into a fan that pushes smoke around the room instead of pulling it out.
Maintenance intervals by filter type:
- Mesh aluminum filters. Clean monthly in the dishwasher or with hot water and degreaser. Inspect for torn mesh and missing clips. Replace every two to three years, more often if you cook daily with oil. In Los Angeles kitchens where wok cooking on high heat is the norm, these filters load up twice as fast.
- Baffle filters (stainless steel). These are the commercial-style filters on higher-end hoods. They never need replacing, but they need cleaning every month. Soak them in hot water and degreaser, then scrub between the baffles with a narrow brush. A baffle filter that’s been ignored for six months has grease caked in the channels that even a commercial degreaser won’t fully lift.
- Charcoal filters (recirculating hoods). These absorb cooking odors and cannot be cleaned. They need replacement every three to six months, with no exceptions. A saturated charcoal filter is doing nothing, no matter how often you run the fan. If your hood recirculates instead of venting outside, this is your only line of defense for indoor air quality.
The consequence of ignoring filters is not subtle. Grease accumulates on the fan blades, throws the motor out of balance, and burns out a $300 blower motor two years early. The hood gets louder as it works less effectively. And if you ever have a stovetop fire, a grease-loaded filter gives the fire a path up into the ductwork. Clean or replace these on schedule.
The Seasonal Caulk Inspection Routine
Caulk is a wear item, not a permanent seal. Silicone caulk advertises a 20-year lifespan on the tube, but in a kitchen it’s exposed to heat, moisture, cleaning chemicals, and movement. Expect two to three years of service before it needs replacement, and inspect it seasonally so you catch failure before water gets behind the wall.
Three joints to inspect every three months:
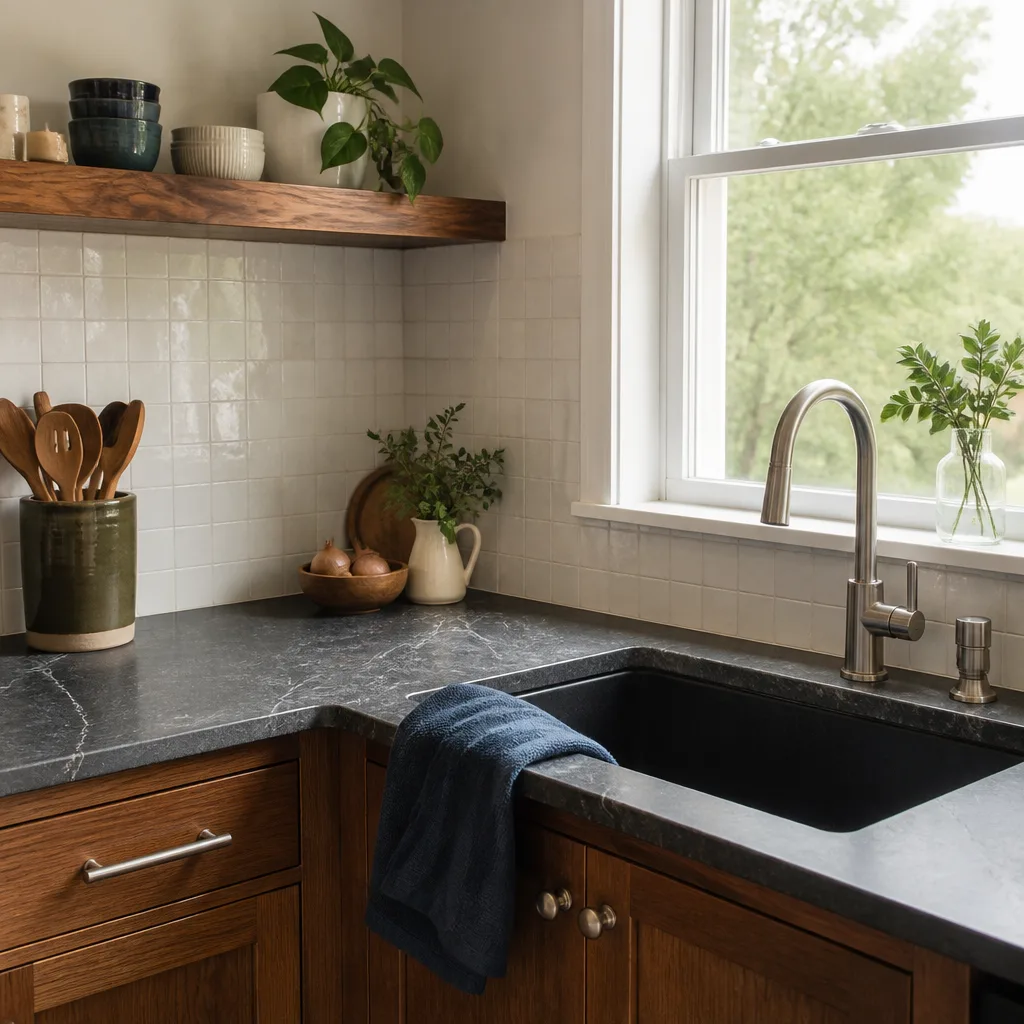
- The sink-to-countertop joint. This is the highest-wear caulk joint in the kitchen. Water sits on it daily, cleaner sits on it, and the sink flexes microscopically with every load of dishes. Look for peeling at the edges, dark spots that indicate mold in the bead, and gaps where the caulk has pulled away from the sink rim.
- The window sill above the sink. If your kitchen sink sits under a window, the sill joint takes direct moisture from splashing plus condensation from the glass. In Los Angeles, where kitchen windows above the sink are common, this joint fails faster than any other. Check the underside of the sill for paint bubbling, which means water has been sitting on the sill and soaking through.
- The backsplash-to-countertop joint. This is a horizontal joint that collects crumbs, water, and cooking grease. Shrinkage cracks here channel water toward the wall behind the base cabinets. If you see gaps wider than a hairline, cut it out and replace it. Water behind a backsplash leads to mold inside the wall cavity, and you won’t see it until the damage is done.
How to replace a caulk bead correctly:
- Remove the old bead completely. Cut it out with a sharp utility knife at both edges. Do not caulk over an old bead. New silicone will not bond to old silicone, and the joint will fail within weeks.
- Clean the joint with isopropyl alcohol. The surfaces must be dry and free of grease. Alcohol degreases and flashes off without leaving residue. Let it dry completely before you apply anything.
- Pack the joint if it’s deep. Joints deeper than half an inch should be filled with foam backer rod, not caulk. Caulk in a deep joint sags, cures poorly, and cracks. Backer rod gives the caulk proper depth to flex.
- Apply 100% silicone, not acrylic caulk. Acrylic caulk is paintable but shrinks and cracks in wet environments. Silicone is not paintable, but it flexes and it’s what a kitchen joint needs. Apply a continuous bead, then tool it with a wet finger or caulk tool to press it into the joint.
- Let it cure 24 hours before water exposure. Silicone forms a skin in 30 minutes, but full cure takes a day. Run water, wipe, and don’t soak the joint until it’s fully cured.
This is a Saturday morning job that costs under $20 in materials. The repair you’re avoiding by doing it: opening the wall behind the base cabinet, replacing drywall and insulation, and repainting, which runs into the thousands.
Cabinet Hardware and Drawer Slide Maintenance
Cabinet hardware is the part of a remodeled kitchen that gets touched thousands of times a year and maintained never. Hinges loosen, slides wear, and soft-close mechanisms stop dampening because nobody adjusts them until a door hangs crooked or a drawer grinds across its track.
Annual hardware maintenance, fifteen minutes:
- Tighten every hinge screw. Use a Phillips head driver, not a drill. Hinge screws on cabinet doors work loose from daily opening and closing. A door that’s slightly crooked at the reveal is usually a loose hinge, not a failed cabinet.
- Check soft-close dampeners. Open a cabinet door and let it close on its own. If it slams, the dampener is worn or the hinge is misaligned. Soft-close dampeners are replaceable on most European-style hinges without removing the door.
- Lubricate drawer slides. Metal ball-bearing slides do not need oil in clean kitchens, but in kitchens with flour, sugar, and dust in the air, a light silicone spray keeps them gliding. Do not use WD-40. It attracts dust and turns into paste inside the slide.
- Check drawer box joints. Dovetailed drawers with solid wood boxes should show no gaps at the joints. If a joint is opening, the drawer is overloaded or the wood has dried. Adjust the load before the joint fails completely.
Cabinet brands like KraftMaid and Wellborn sell their cabinets with adjustable hinges and replaceable slides as standard hardware. That’s a maintenance advantage: a hinge fails, you replace the hinge, not the door. The cabinetry on a Home Remodeling in Los Angeles project should all run on replaceable hardware. If any cabinet in your remodeled kitchen has fixed, non-adjustable hinges, that’s a sign it was built to a lower specification.
Common Mistakes to Avoid
- Waiting until the warranty period ends to inspect. The first 30 days after a remodel are when the contractor is most responsive, and the first year is when the warranty covers defects. If a hinge is grinding at month two and you report it at month fourteen, you’re paying for the fix. Report everything in writing during the active warranty window.
- Sealing granite too often or not at all. Over-sealing granite creates a hazy film that dulls the stone. Under-sealing leaves it vulnerable to staining. The water-bead test tells you exactly when to reseal. Trust the test, not the calendar.
- Cleaning quartz with acidic cleaners. Vinegar, bleach, and citrus cleaners etch the resin binder in quartz and leave permanent dull spots. Use only pH-neutral stone cleaner. The countertop costs too much to clean it with kitchen staples.
- Ignoring a loose disposal mount. A disposal that wiggles at the sink flange is a leak waiting for the moment the plumber’s putty lets go. It’s a two-minute fix under the sink. Ignoring it means the cabinet floor rots under the disposal, and that’s a cabinet replacement, not a tightening.
- Running the range hood with a loaded filter. A clogged filter makes the blower work harder, burn out faster, and fire risk goes up. If you can’t see light through a mesh filter, it’s overdue.
- Caulking over old caulk. New silicone will not bond to cured silicone. The joint fails, water gets behind it, and you’re doing the job twice. Strip it out, clean it thoroughly, start fresh.
- Using the wrong grout cleaner on tile countertops. Acidic grout cleaners dissolve the grout you’re trying to clean. Tile grout needs a pH-neutral cleaner and a gentle brush. If you’ve already etched grout lines with acid, regrout before the cracks let water through.
When to Call a Professional
Some maintenance tasks cross the line from homeowner work to contractor work, and knowing the difference saves money. Call a professional when you see water staining that has spread beyond a single cabinet, when a cabinet box has swollen at the joints, when tile is loose over an area larger than a dinner plate (the substrate is failing), or when a range hood blower motor is grinding and needs replacement. Anything involving gas lines, electrical wiring, or load-bearing structure should have a licensed contractor on it from the start. Bradford Remodeling offers free estimates in Los Angeles; call (903) 568-7222 and we’ll send someone out who can tell you what’s a maintenance item and what’s a real repair, in writing, before any work starts.
Frequently Asked Questions
Mesh aluminum filters need cleaning monthly and replacing every two to three years. Baffle filters need cleaning monthly but last the life of the hood. Charcoal filters in recirculating hoods need replacement every three to six months. Grease buildup increases fire risk and burns out the blower motor early.
Pour a quarter-cup of water on the surface and wait ten minutes. If the water beads up, the sealer is intact. If it soaks in and darkens the stone, reseal with a penetrating stone sealer. In Los Angeles, granite near the range typically needs resealing every six to twelve months, while granite in low-use areas may go two years. Call (903) 568-7222 if you want a professional assessment.
Yes. The process is: cut out the old bead completely, clean the joint with isopropyl alcohol, pack deep joints with backer rod, apply 100% silicone, tool it smooth, and let it cure 24 hours before water exposure. It’s a one-hour job that costs under $20 in materials.
Run the faucet hot and cold and the disposal while wiping every connection with a dry paper towel. Moisture at a specific fitting means that connection is leaking under pressure. If you find no moisture but the floor is warped, the leak may be intermittent, from the dishwasher drain, or from the faucet above the counter dripping along the sink rim. It’s worth having a professional inspect before the cabinet floor rots through.
At the 30-day mark, check cabinet hinge adjustments, drawer slide seating, faucet connections for moisture, grout hardness with a thumbnail press, and the dishwasher drain loop for proper installation. Document any issues in writing with photos and send them to your contractor during the active warranty period. This is the window when fixes are fastest and covered.
A quality kitchen remodel with proper maintenance should last 15 to 20 years before surfaces need replacement. The variables are cabinet construction quality, countertop material choice, and how faithfully the maintenance schedule is followed. The kitchens that fail early are usually the ones where the caulk joints went unchecked for years and water found its way into the substrate. A General Contractor in Los Angeles who gives you a written maintenance checklist at closeout is a contractor worth keeping.
The Bottom Line
A remodeled kitchen is a system with service intervals, not a finished product you set and forget, as covered in our Kitchen Remodeling Troubleshooting: Common Problems and How to Fix Them. The 30-day checklist catches install defects while the warranty is active. Annual material maintenance keeps stone sealed, wood oiled, and quartz protected from heat. Ninety-day under-sink checks catch water damage before it rots the cabinet. Range hood filters need monthly attention. Caulk joints need replacing every two to three years. All of that is the difference between a kitchen that looks good at year one and a kitchen that still looks good at year fifteen. And if you’d rather not spend your Saturdays under the sink, Bradford Remodeling is a phone call away at (903) 568-7222.
Written by Curtis Lane, Owner at Bradford Remodeling, serving Los Angeles since 2004. Explore our more guides & resources for homeowners.
See the difference
 Before
 After
After Before
 After
After Before
 After
After